Case Study - Wood burning stove or open fireplace?
Case Study - Wood burning stove or open fire place?
My house was built brand new in 1990 and in the sitting room we had a conventional open fireplace with a brick chimney on the outside. We had over the years thought about the possibility of installing a wood burning stove but we had never taken the trouble to investigate it further.
In 2014 we decided to carry out a major building project which involved adding a two storey extension and at the same time doing a loft conversion. As we were about to be going through a sustained period of total upheaval, we decided to consider what else should be done at the same time. The possibility of a wood burning stove was now on the agenda.
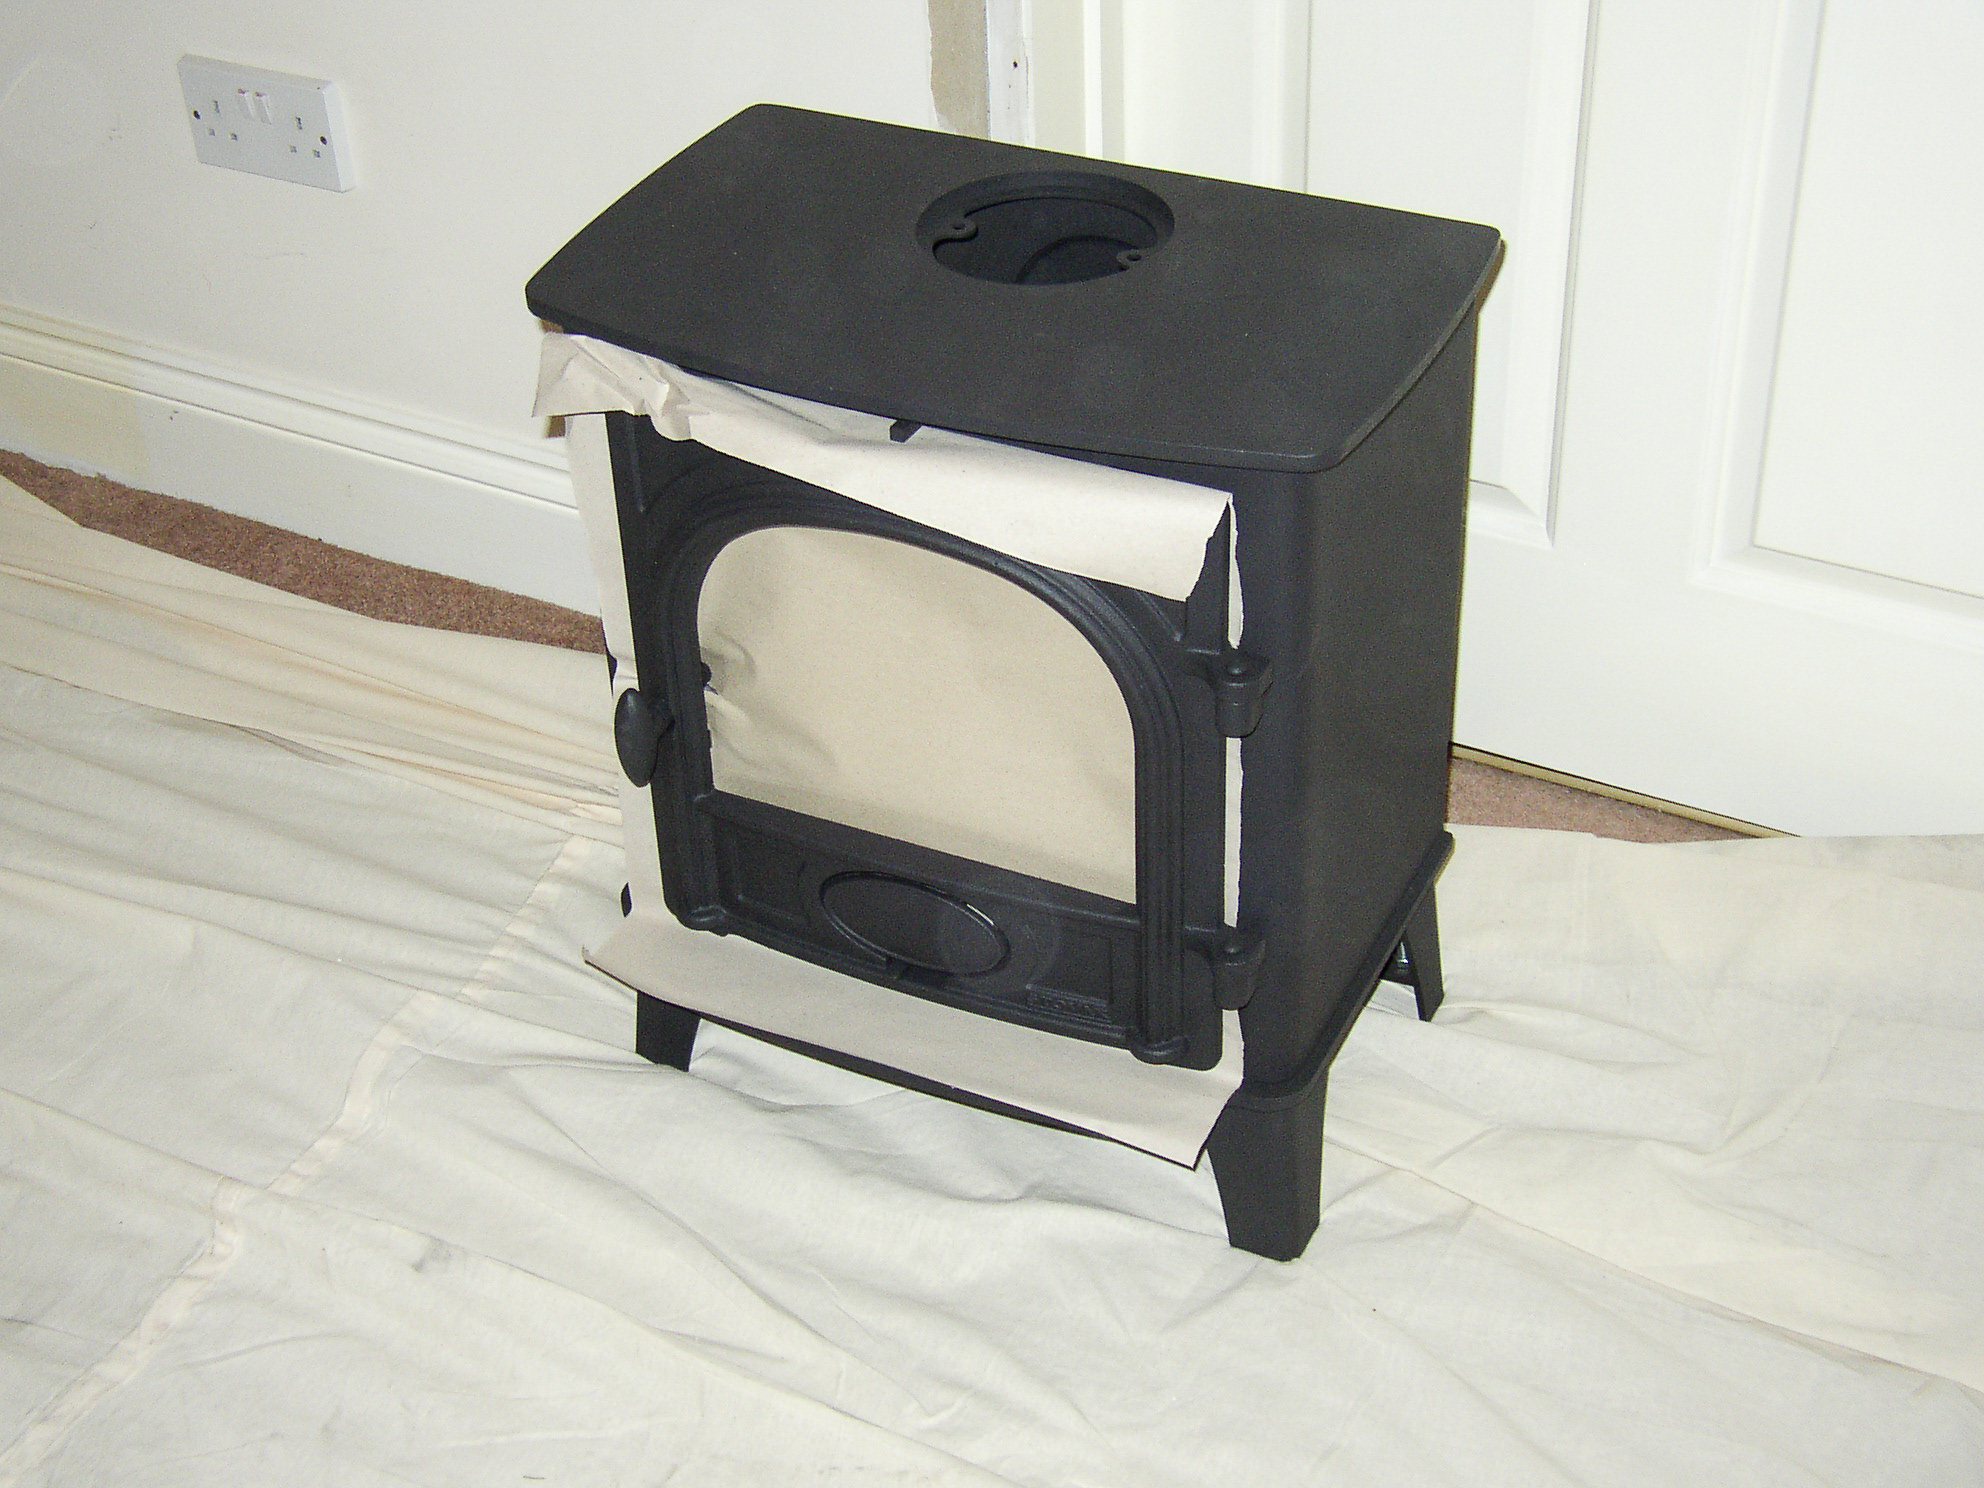 Wood burning stove
We realised the following:
- We only lit the fire occasionally in the winter. Most of the time it was not used.
- The fireplace was open to the outside world and cold drafts came down the chimney and no doubt a lot of the heat from our sitting room was lost straight up the chimney. We did put a piece of 3ply over the big hole to reduce the drafts and help keep the room warm but we still got some cold air seeping through.
- We also stuffed screwed up pages of newspaper up into the chimney to reduce the drafts. This did help a lot but it did not completely seal it and whenever we wanted to light the fire, we first had to remove all the newspaper to open the chimney again.
- The fire was not very energy efficient as the chimney was built onto the outside of the house. Most of the heat being radiated from the chimney was lost.
- The plan for our new two story extension was that it would be built onto the outside wall directly behind the fireplace. If we left the chimney in situ, we would lose a lot of space from inside the new room. If we took the chimney down, we would gain a lot of space, but the cost to dismantle the chimney would be significant.
- If we were to install a wood burning stove, this would be much more heat efficient. The door on the stove would reduce any drafts and the metal flue could be taken up through our house radiating heat everywhere.
After giving careful consideration to the above, we decided to take the chimney down, brick up the fireplace and install a new wood burning stove and metal flue.
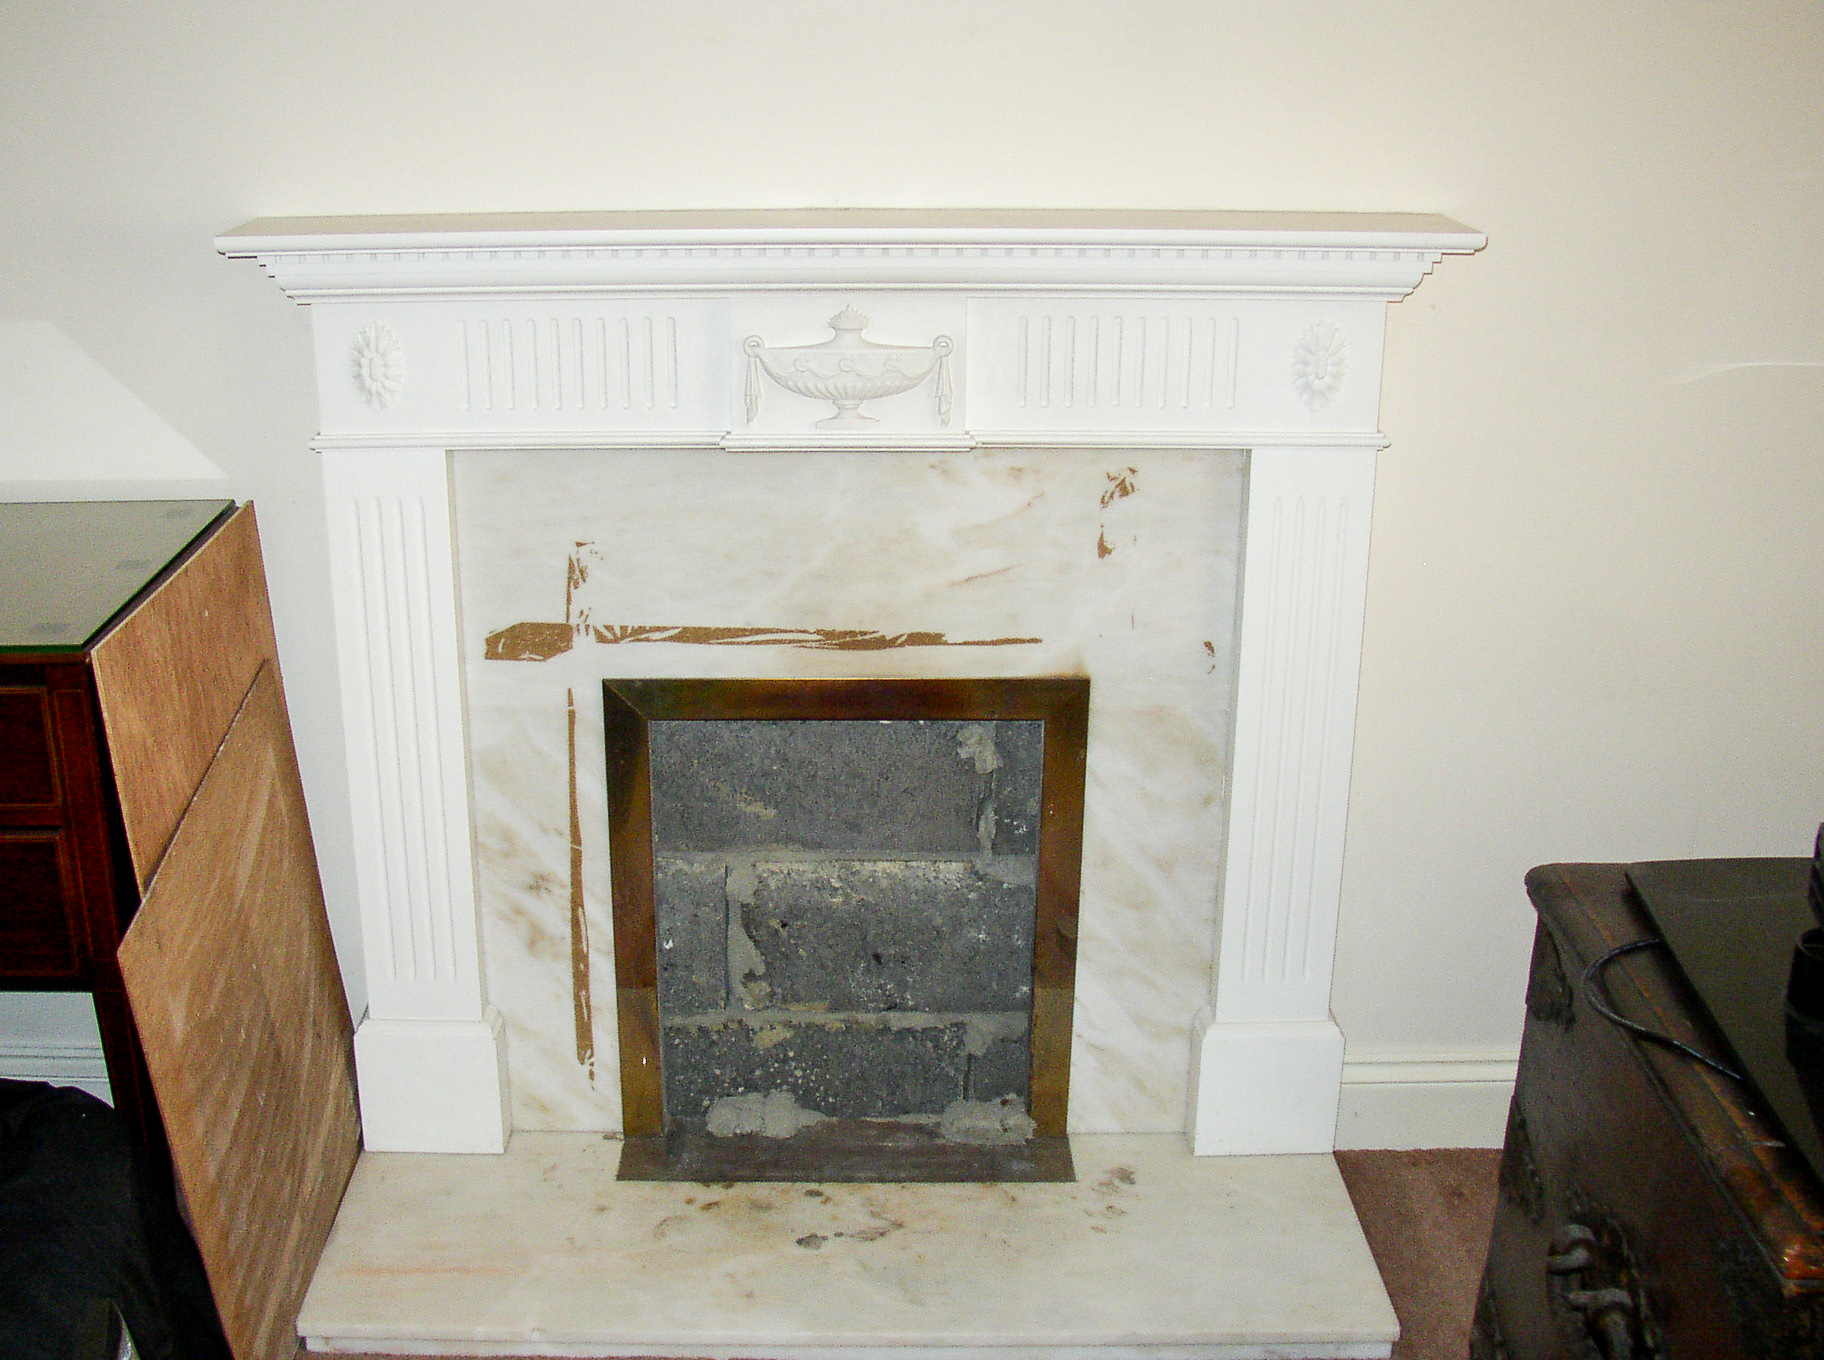 Bricked up fireplace
The next step was to get quotes for the new stove. We contacted three potential suppliers and arranged meetings, discussed possibilities, and requested quotations.
I was very favourable to the option of getting a water tank into the back of the stove and then running the hot water off into a few radiators to help disperse heat around the house. Unfortunately I had to give up on this idea fairly quickly, as none of the suppliers were really geared up to do this and if they were going to do it, the cost was going to be very high.
The next question was; should we have a big stove or a little stove? We talked to friends and consistently everyone said only get a small stove as they do generate a lot of heat. In addition, if you get a big stove, you will have to have an external vent to let air in. This will be cold air and so you may find that the room is hot if you are sitting next to the fire but cold if you are sitting next to the vent. We decided to go for a small wood burning stove that was just less than 5kW and thus we did not need an external vent.
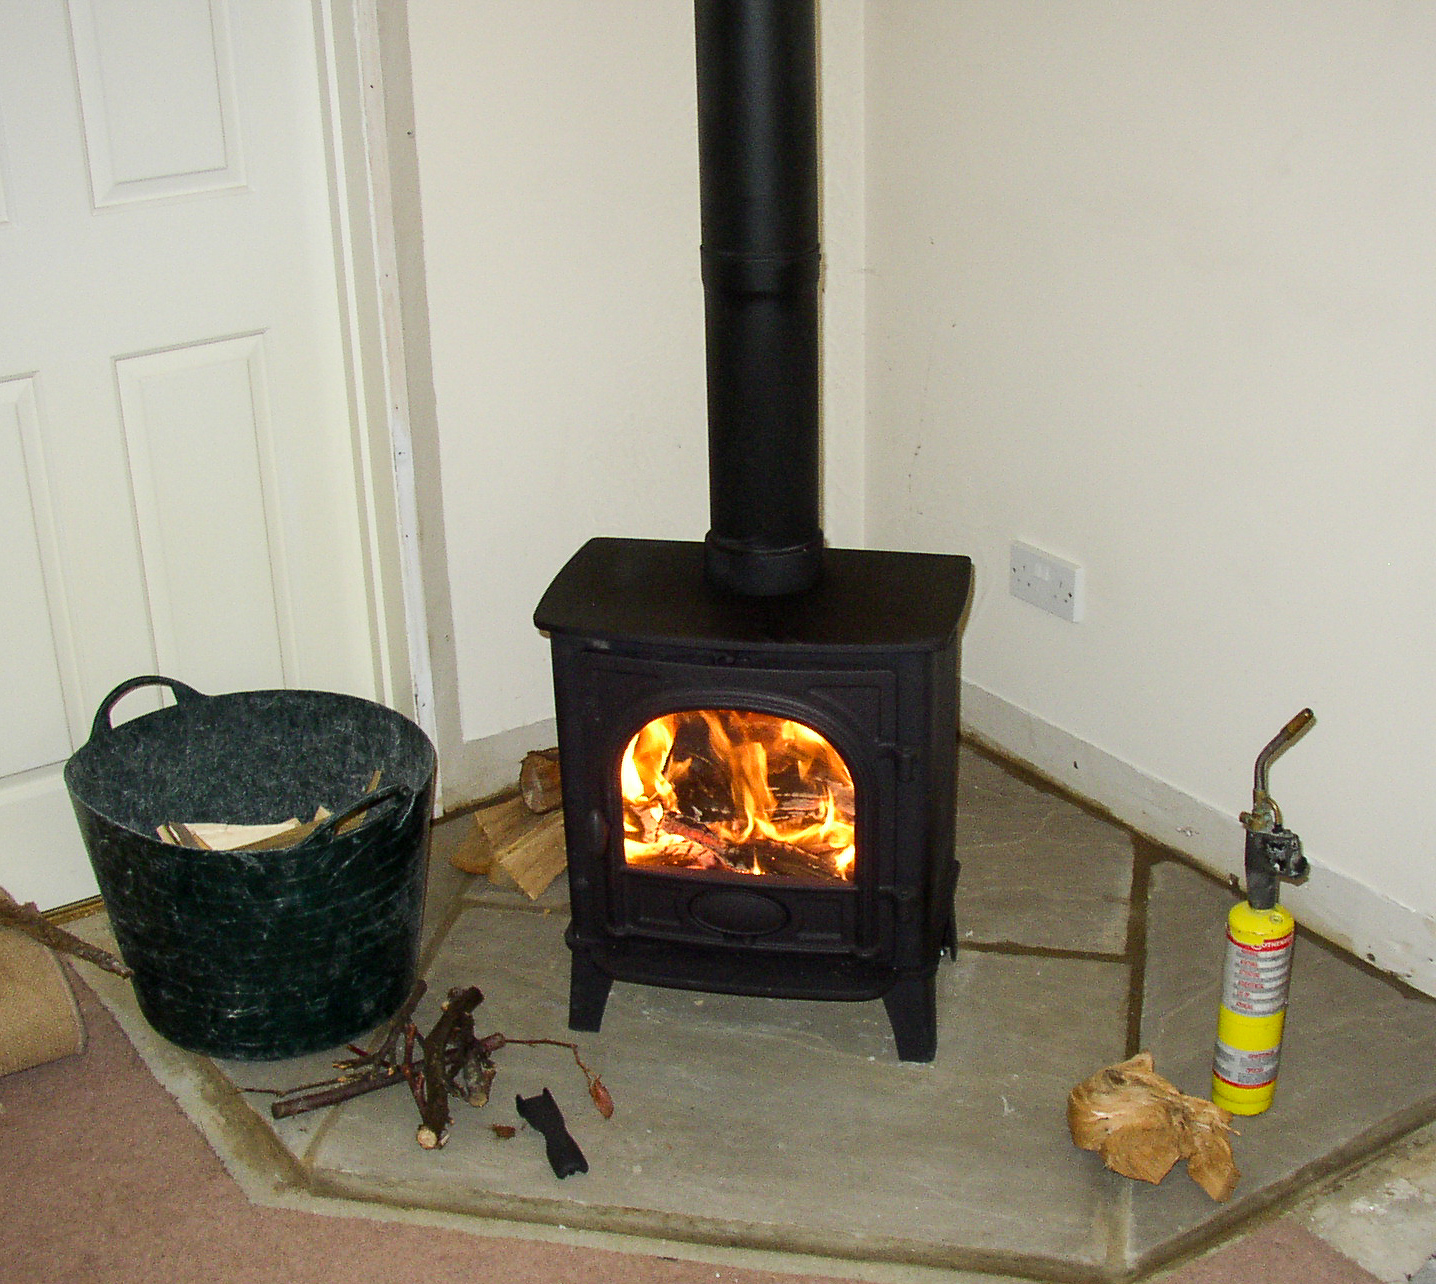
Installing and testing the wood burner
So far so good. We now had to figure out where in the sitting room we would position the new stove. As it turned out, this ended up being the most complicated part of the design exercise. We wanted the metal flue (chimney) to go up through all three levels of the house so we could get the maximum amount of heat from it. Going straight up above the stove was fine until we went through the ceiling and into the middle level and then on up through the top level. In the middle level of the house, it was preferable for the flue to be in the corner of a room but this was not easy to achieve. The same applied to the top level. It was best if the flue could go straight up through these two levels with no bends but if we were going to have bends we were restricted to no more than two.
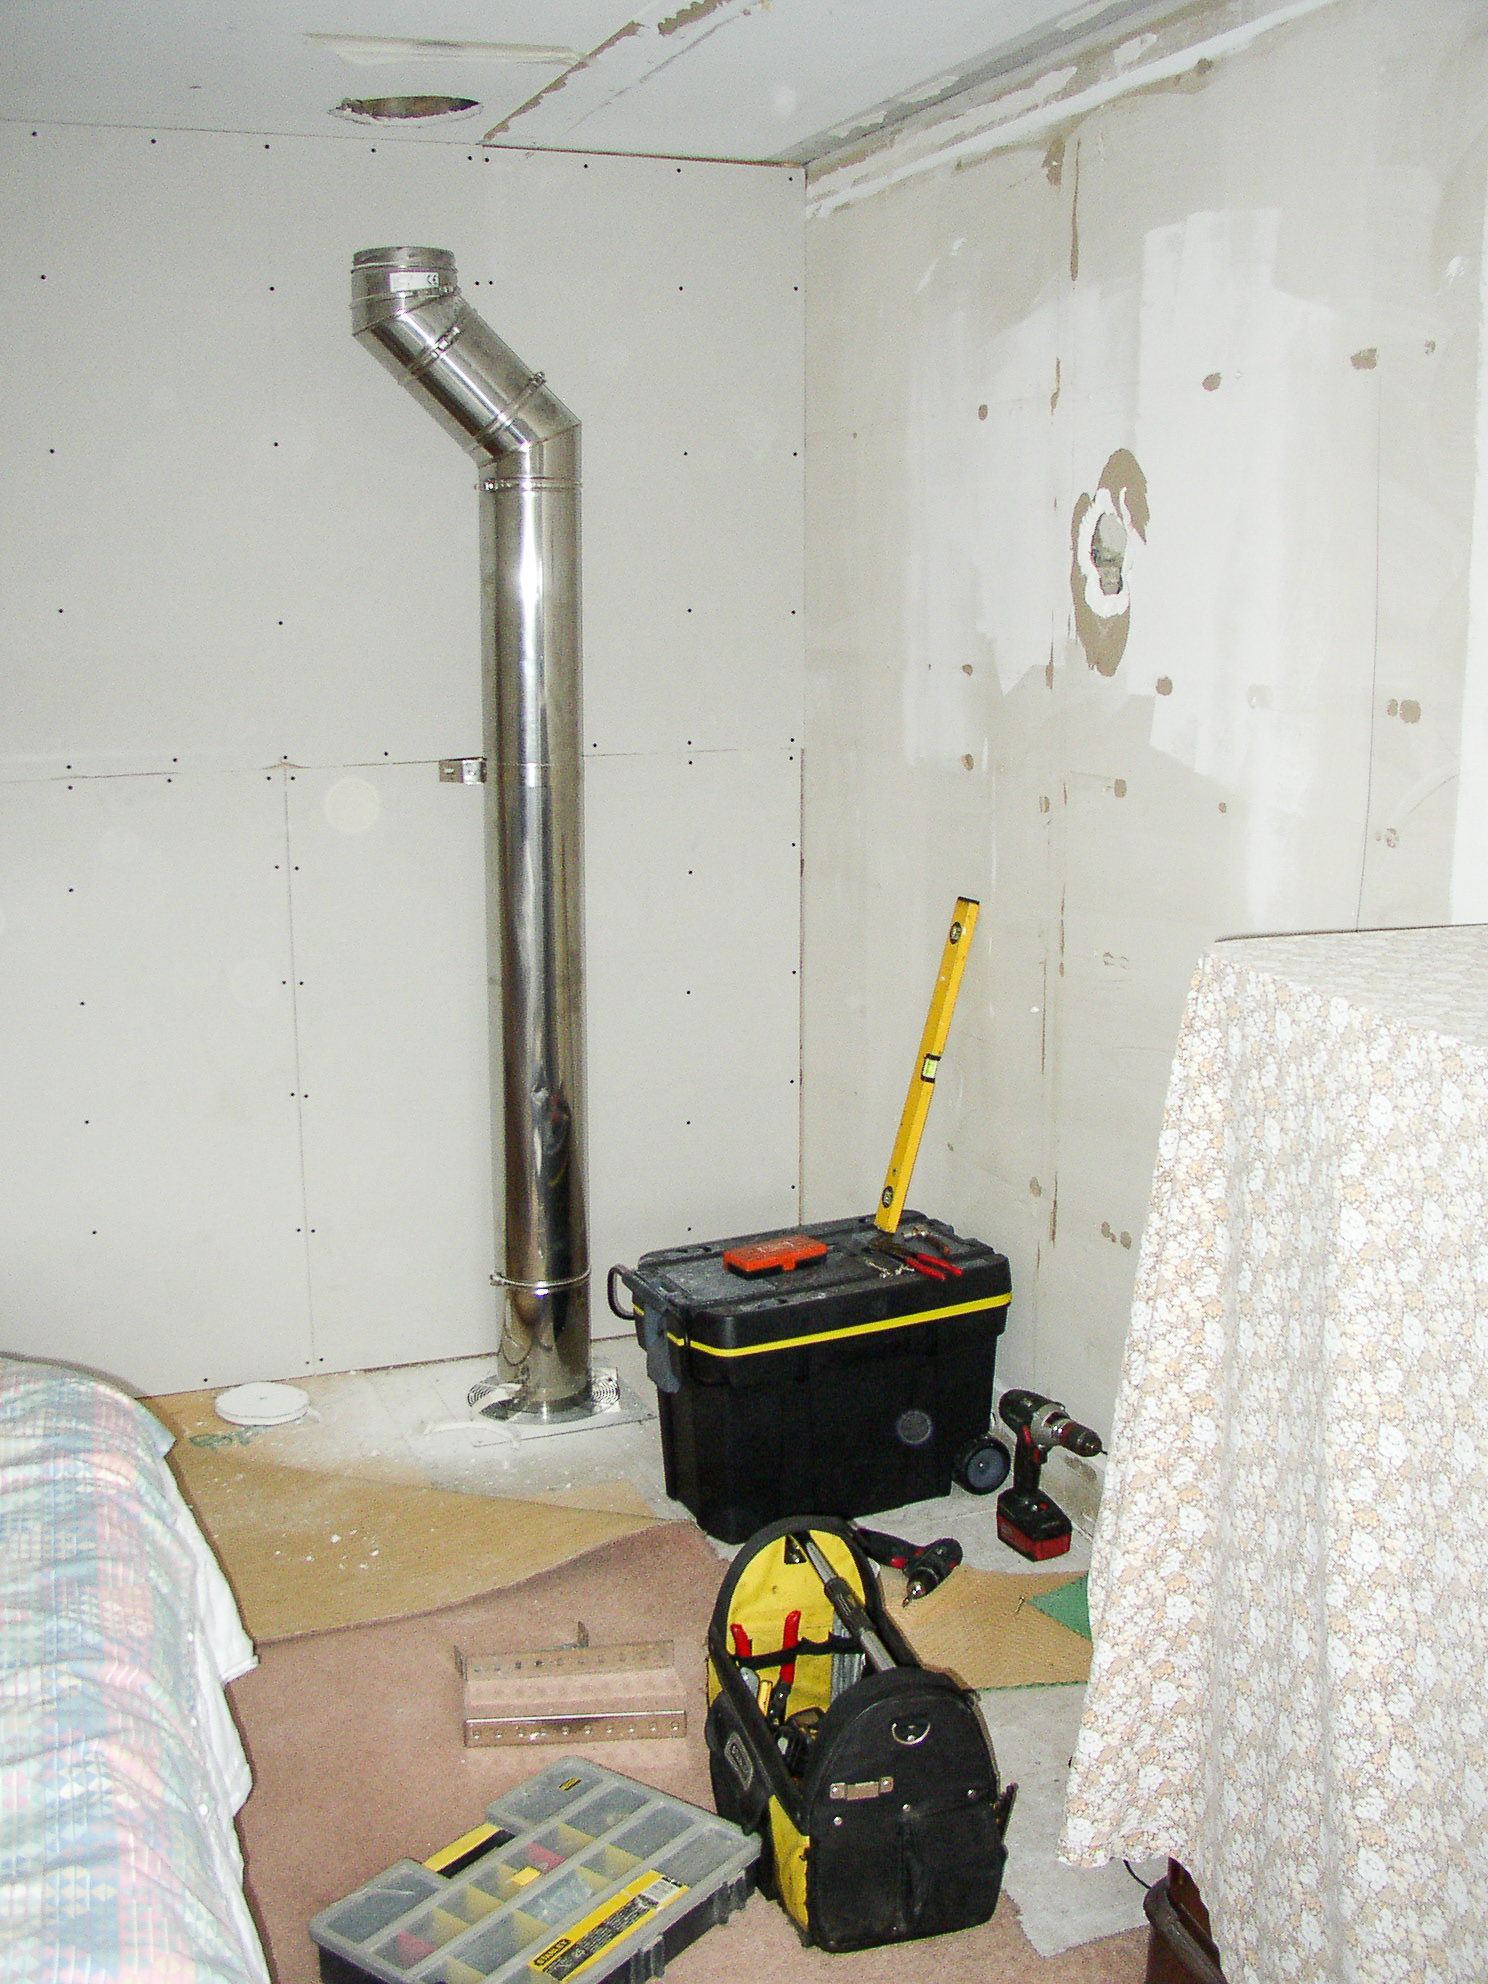
Pipework going through the house
After a lot of thought we managed to work out a way for the wood burning stove to be located in the corner of the sitting room and close to the centre of the house. Taking the flue straight up without any bends was just not possible but by putting in two bends we were able to achieve what we needed. Passing up through the middle level we managed to locate the flue in a corner and I then build a box section with holes around it so that the warm air could circulate. Then around that I built a large airing cupboard. Through the top level of the house the flue passed through a small bedroom and once more we were able to have it in a corner. I created a box section with lots of holes to again allow the warm air to circulate. After that the flue passed on up into the attic where a wire cage was built around it. From there it completed its journey popping up through the roof to the outside world.
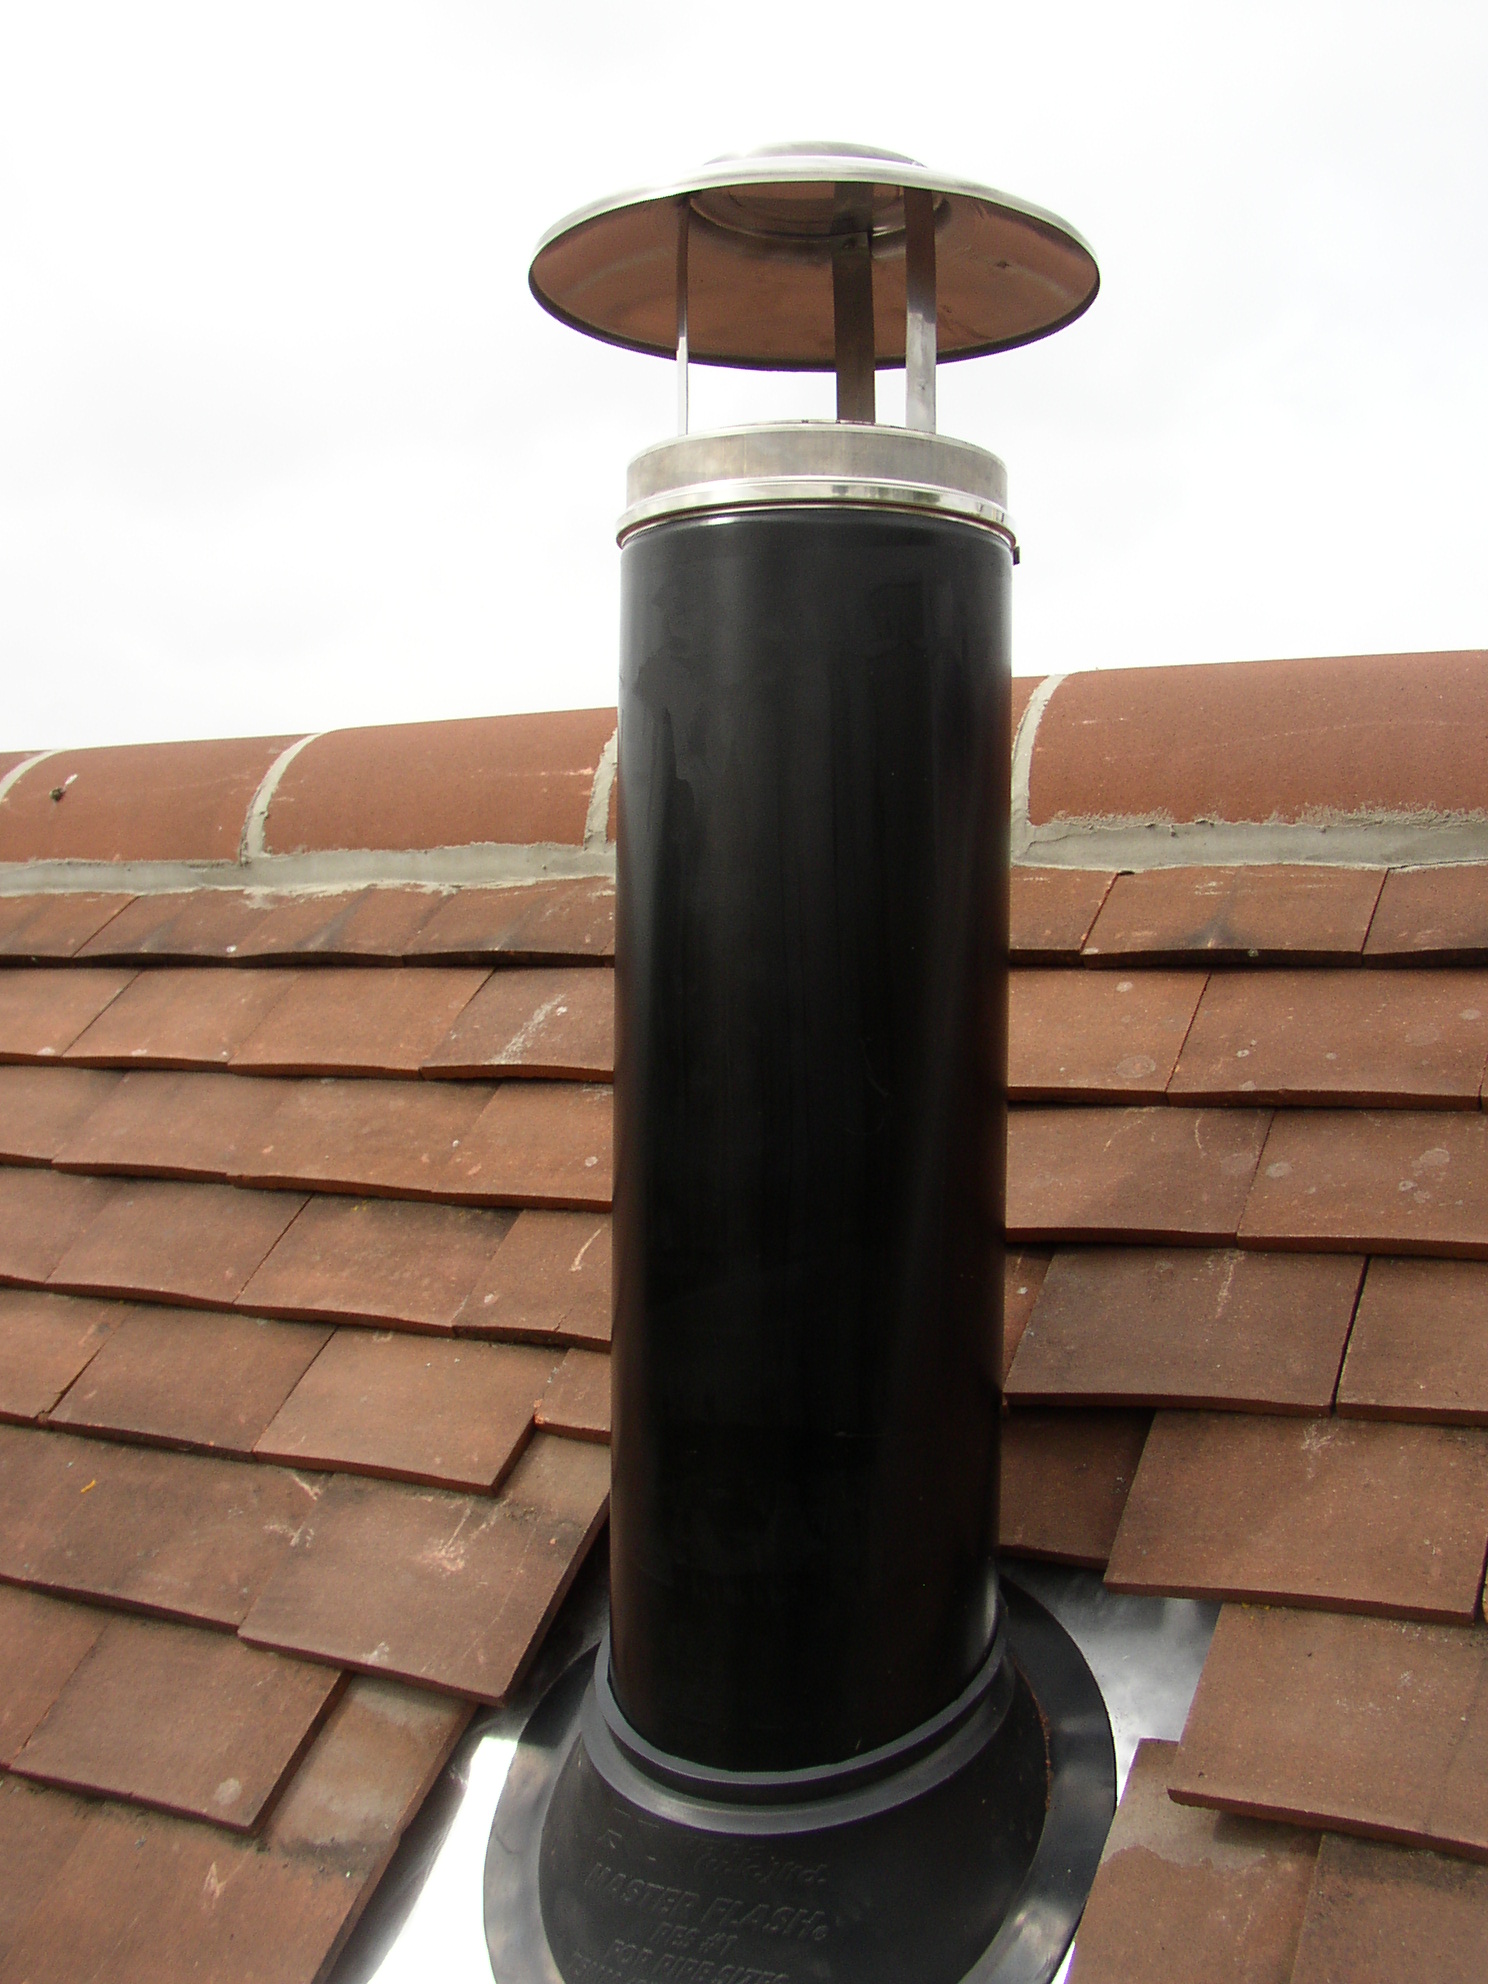
Chimney for wood burner
I had to be very careful building the box sections around the metal lined chimney flue. The flue was held in place by metal brackets and the box sections had to be built so there was no combustible material close to the flue. A fairly obvious requirement as we don’t want the house to accidently burn down. If you are building your own box sections, make sure you check the requirements for minimum distance (in my case 5cm for my double lined flue). This is one thing that you must not get wrong.
One other thing that lots of people forget, is that you will need to have a pile of wood material to burn inside the stove. Yes sounds obvious but keep in mind that you need a lot of it and you need somewhere dry to store it. I my case, I had quite a lot of materials left over after the building project and with these I was able to build a suitable shed in my garden.
The total cost ended up being £3,753 inclusive of VAT (2014). This was the cost of the stove, the hearth and installation of the flue. Our wood burning stove has proved to be an excellent way to get extra heat into the house in the winter period and we are very pleased with it. In fact I am still burning offcuts and scraps that I collected up during the house rebuild.
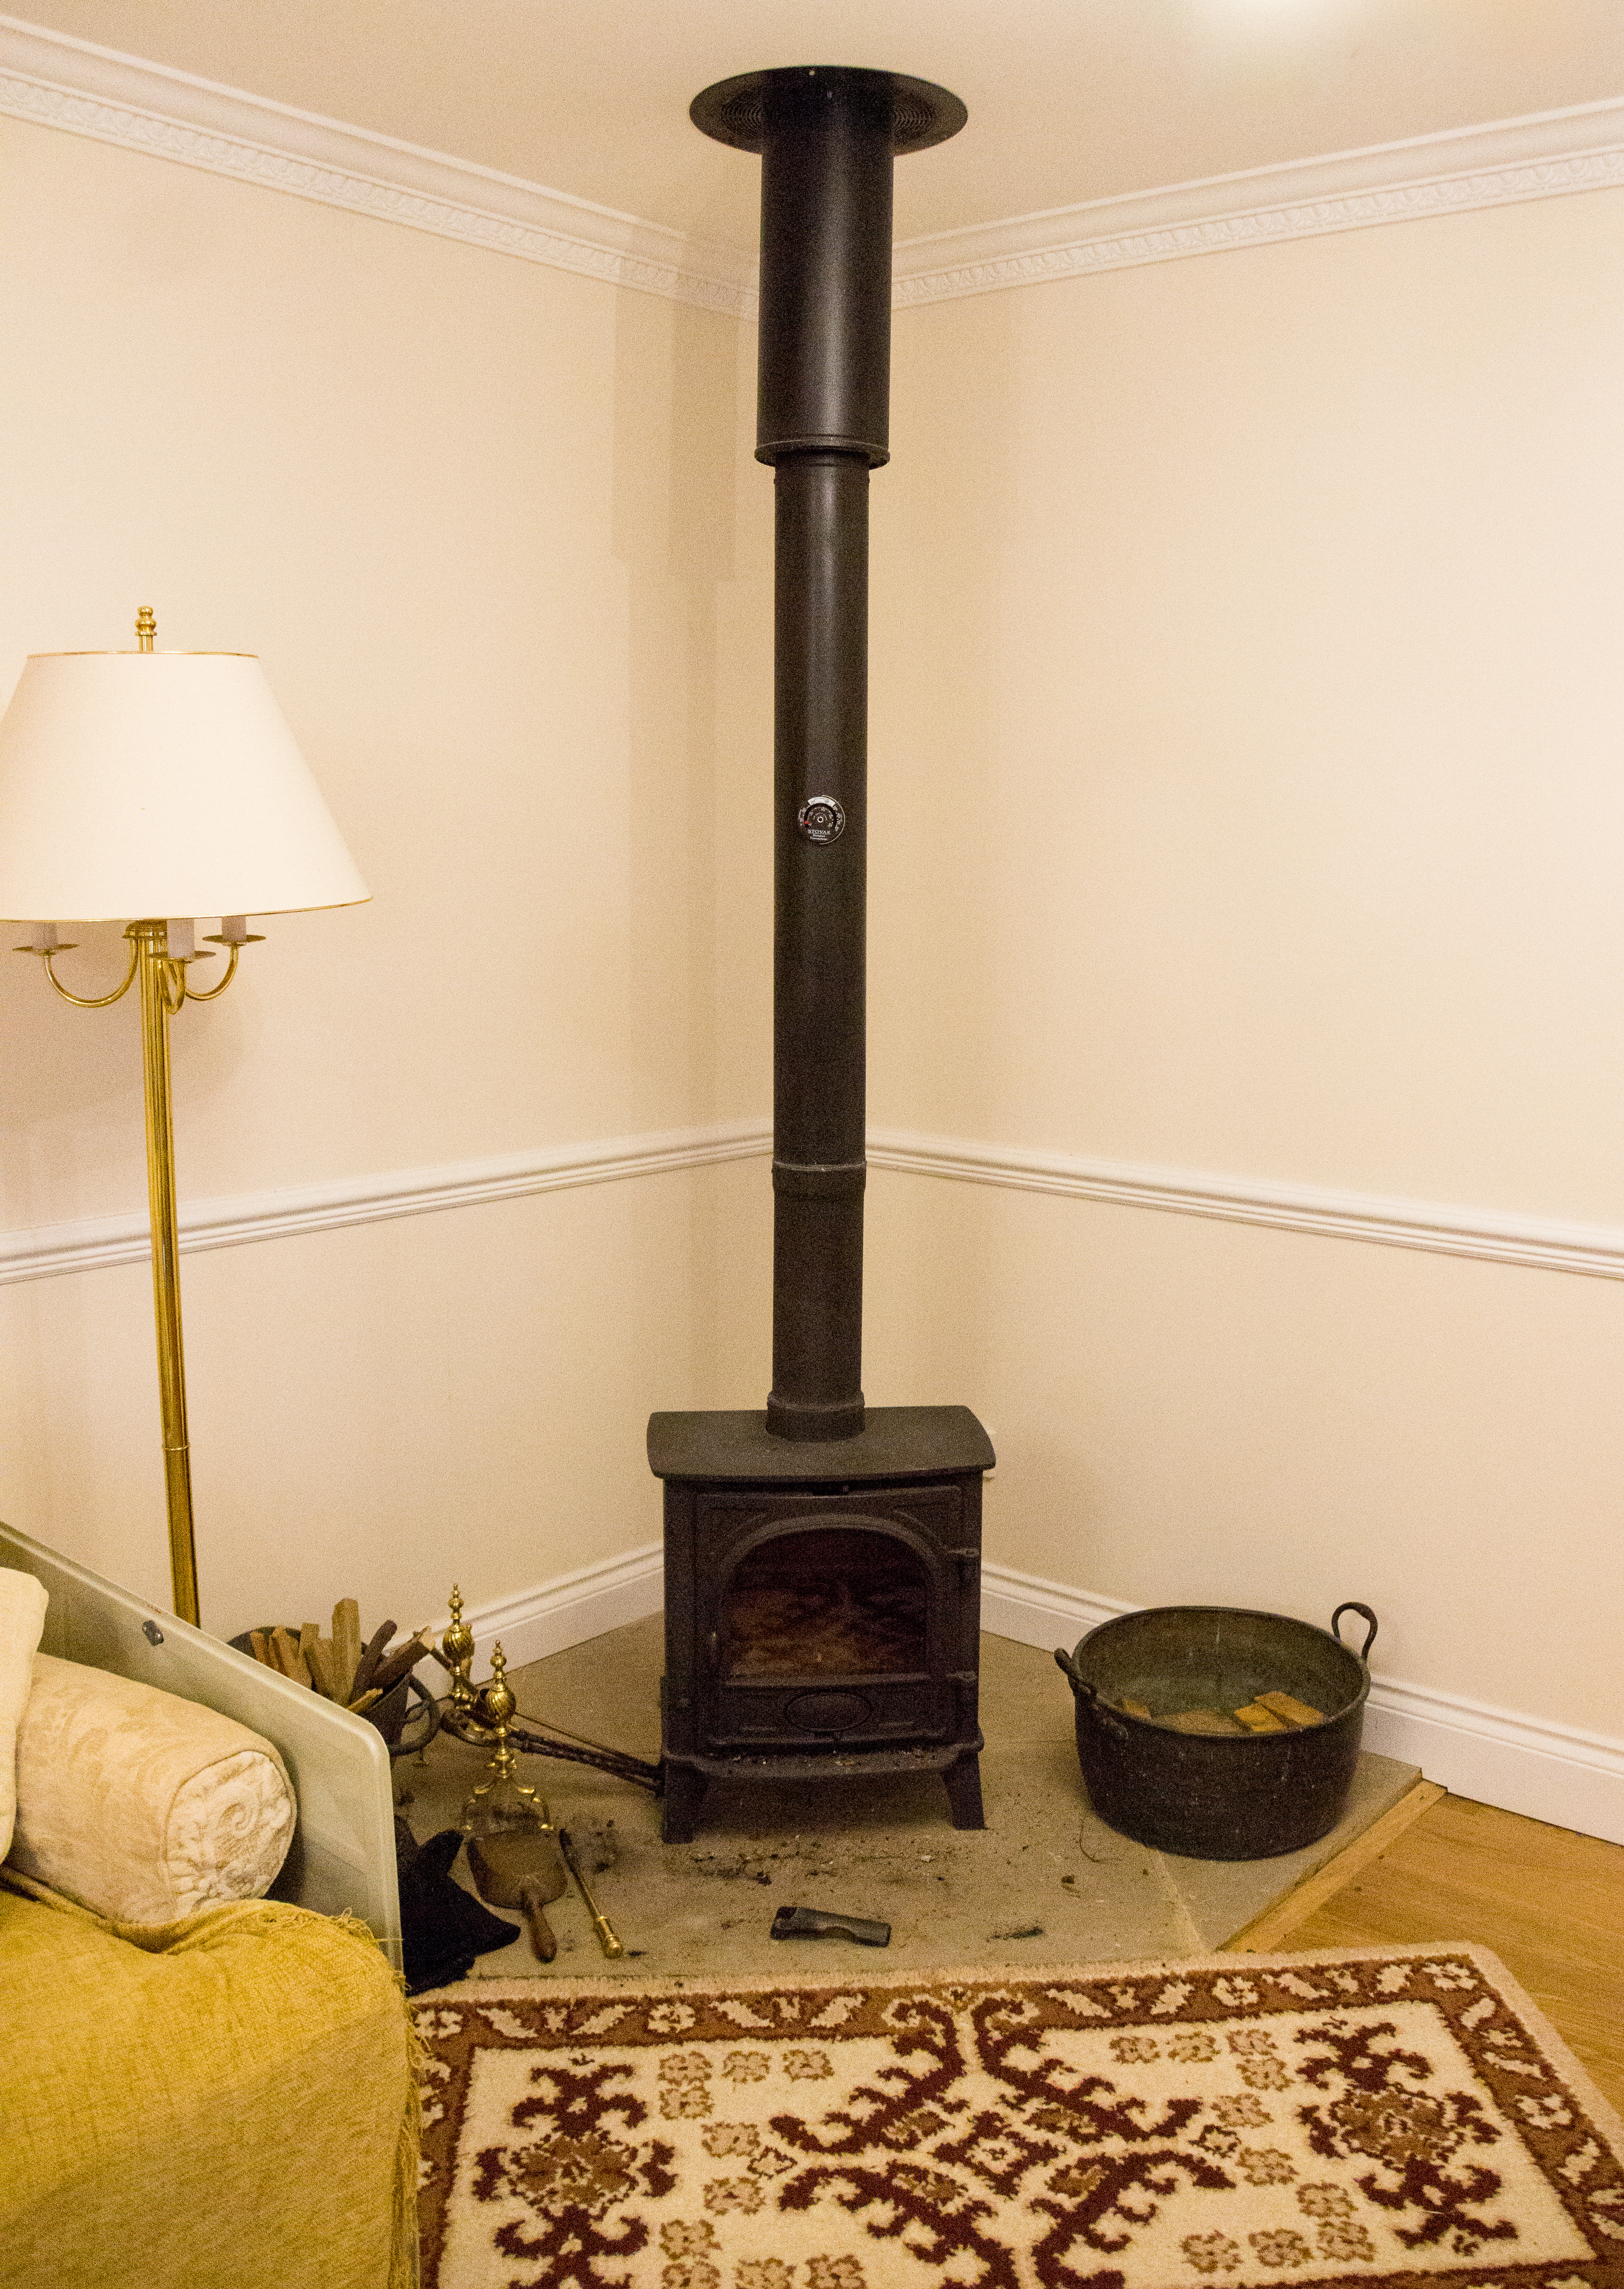 Wood burner installed in the corner of the room
Article written by JJ Heath-Caldwell